
HP LaserJet M1530 Pro MFP
Рейтинг


Модули
Internal assemblies 3
Internal assemblies 1
Internal assemblies 2
Scanner and document feeder main assemblies
Internal assemblies 4
Print engine covers
Document feeder assembly parts
Детали Document feeder assembly parts
| Деталь: | LASER SCANNER ASSEMBLY |
| Парткод: | RM1-7560-000CN |
| Деталь: | Motor PCA |
| Парткод: | RM1-7633-000CN |
| Деталь: | CABLE, FLAT |
| Парткод: | RM1-7739-000CN |
| Деталь: | MOTOR, DC24V |
| Парткод: | RM1-7544-000CN |
| Деталь: | Duplex PCA |
| Парткод: | RM1-7620-000CN |
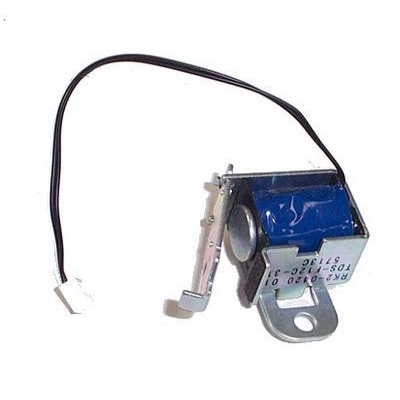
| Деталь: | Solenoid, duplex |
| Парткод: | RK2-0420-000CN |
| Цена: | 500 ₽ |
| Деталь: | FAN |
| Парткод: | RK2-3438-000CN |
| Цена: | 1 800 ₽ |
| Деталь: | LINK, CARTRIDGE DOOR |
| Парткод: | RC2-9514-000CN |
| Деталь: | Fuser, 110 volt |
| Парткод: | RM1-7576-000CN |
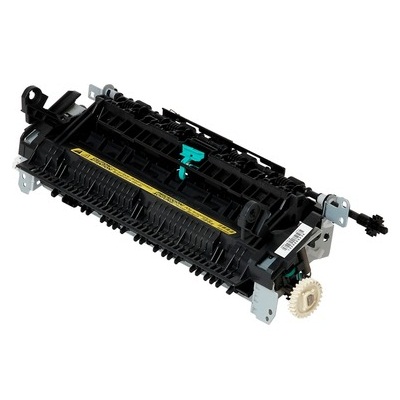
| Деталь: | Fuser, 220 volt |
| Парткод: | RM1-7577-000CN |
| Цена: | 14 400 ₽ |
| Деталь: | Engine controller PCA, 110 volt |
| Парткод: | RM1-7629-000CN |
| Деталь: | Engine controller PCA, 220 volt |
| Парткод: | RM1-7630-000CN |
| Деталь: | Power switch assembly |
| Парткод: | RM1-7573-000CN |
| Деталь: | Delivery sensor PCA |
| Парткод: | RM1-7440-000CN |
| Деталь: | Fuser film assembly, 110 volt |
| Парткод: | RM1-7541-000CN |
| Деталь: | Fuser film assembly, 220 volt |
| Парткод: | RM1-7542-000CN |
| Деталь: | LINK, PRESSURE RELEASE |
| Парткод: | RC2-9531-000CN |
| Деталь: | Switch lever assembly |
| Парткод: | RM1-7531-000CN |
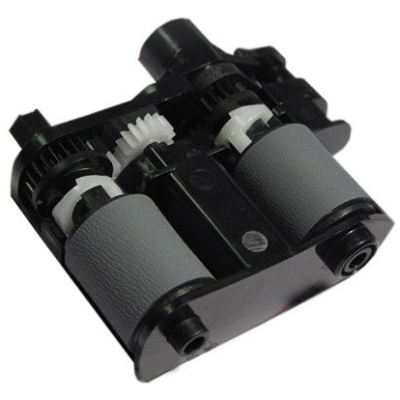
| Деталь: | Paper pickup assembly |
| Парткод: | RM1-7575-000CN |
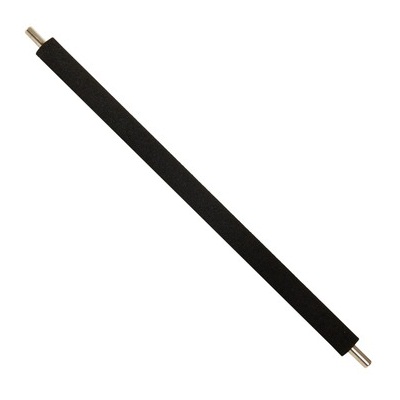
| Деталь: | TRANSFER ROLLER |
| Парткод: | RM1-4023-000CN |
| Цена: | 1 500 ₽ |
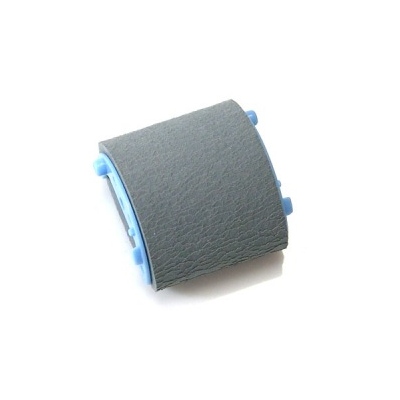
| Деталь: | Roller, pickup |
| Парткод: | RL1-1497-000CN |
| Цена: | 260 ₽ |
| Деталь: | Paper pickup sensor PCA |
| Парткод: | RM1-7632-000CN |
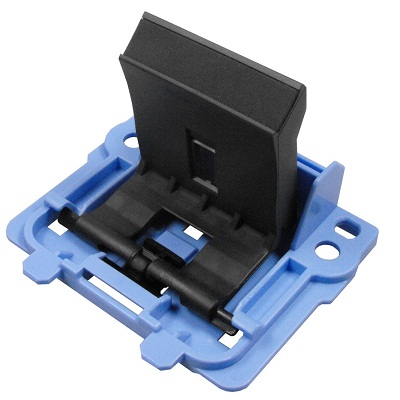
| Деталь: | SEPARATION PAD ASSEMBLY |
| Парткод: | RM1-4227-000CN |
| Цена: | 500 ₽ |
| Деталь: | Duplex frame assembly |
| Парткод: | RM1-7525-000CN |
| Деталь: | Document feeder (ADF) motor cover |
| Парткод: | CE538-40015 |
| Деталь: | Document feeder (ADF) assembly |
| Парткод: | CE538-60121 |
| Деталь: | Solar lock, document feeder |
| Парткод: | CE538-40031 |
| Деталь: | SCANNER ASSEMBLY |
| Парткод: | CE538-60118 |
| Деталь: | Control panel assembly, Western |
| Парткод: | CE539-60101 |
| Деталь: | Control panel assembly, Asian |
| Парткод: | CE539-60102 |
| Деталь: | Hinge, floating (not shown) |
| Парткод: | CE538-40006 |
| Деталь: | Hinge, scanner sub-assembly |
| Парткод: | CE538-60135 |
| Деталь: | Cable, formatter FFC |
| Парткод: | CE538-60134 |
| Деталь: | Formatter |
| Парткод: | CE544-60001 |
| Деталь: | Fax Board-US |
| Парткод: | CE682-60001 |
| Деталь: | Fax Board-EU |
| Парткод: | CE683-60001 |
| Деталь: | Core-ferrite flat cable ROHS |
| Парткод: | 9170-2385 |
| Деталь: | Clip, ferrite |
| Парткод: | CB534-00010 |
| Деталь: | Core-ferrite rectangle EMI ROHS |
| Парткод: | 9170-1821 |
| Деталь: | COVER, LEFT |
| Парткод: | RC2-9523-000CN |
| Деталь: | COVER, TOP |
| Парткод: | RC2-9520-000CN |
| Деталь: | Cartridge door assembly |
| Парткод: | RM1-7574-000CN |
| Деталь: | COVER, RIGHT |
| Парткод: | RC2-9522-000CN |
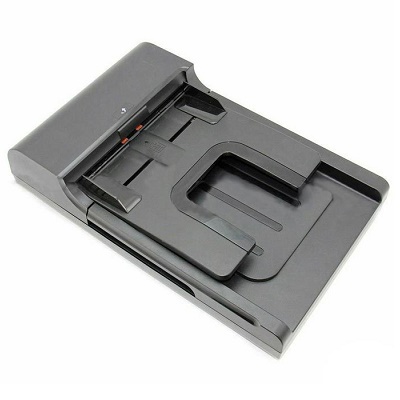
| Деталь: | Paper delivery tray (output bin) assembly |
| Парткод: | RM1-7498-000CN |
| Деталь: | COVER, DUST |
| Парткод: | RC2-9578-000CN |
| Деталь: | Paper pickup tray assembly (input tray) |
| Парткод: | RM1-7534-000CN |
| Деталь: | COVER, FRONT |
| Парткод: | RL1-2899-000CN |
| Деталь: | Duplexing door assembly (rear cover) |
| Парткод: | RM1-7526-000CN |
| Деталь: | Document feeder (ADF) core assembly |
| Парткод: | CE538-60122 |
| Деталь: | Document feeder (ADF) input tray |
| Парткод: | CE538-60127 |
| Деталь: | Document feeder (ADF) base |
| Парткод: | CE538-60126 |
| Деталь: | Document feeder (ADF) cover, outer |
| Парткод: | CE538-40009 |
| Деталь: | Document feeder (ADF) pick arm assembly |
| Парткод: | CE538-60137 |
| Деталь: | Spring, document feeder (ADF) extension (pre-pick) |
| Парткод: | Q7400-00011 |
| Деталь: | Shaft, document feeder (ADF) pick extension |
| Парткод: | Q7400-40047 |
| Деталь: | Document feeder (ADF) cover, inner |
| Парткод: | CE538-40008 |
| Деталь: | Roller assembly, document feeder (ADF) post-scan pinch |
| Парткод: | Q7400-60153 |
Коды ошибок
01
02
03
04
05
06
07
08
09
10
11
12
13
14
15
16
17
18
19
20
21
22
23
24
25
26
27
28
29
30
31
32
33
34
35
36
37
38
39
40
41
Описание
| Error code: | 01 |
| Display: | ERROR CONDITION INVALID HEAD |
| Description: | The ERROR light flashes. |
| Causes: | The printhead was replaced with one that is not a genuine Zebra™ printhead. |
| Remedy: | Install a genuine Zebra printhead. |
| Error code: | 02 |
| Display: | ERROR CONDITION RIBBON OUT |
| Description: | The printer stops; the ERROR light flashes. |
| Causes: | In thermal transfer mode, ribbon is not loaded or incorrectly loaded. In thermal transfer mode, the ribbon sensor is not detecting ribbon that is loaded incorrectly. In thermal transfer mode, media is blocking the ribbon sensor. In thermal transfer mode, the printer did not detect the ribbon even though it is loaded correctly. |
| Remedy: | Load ribbon correctly. 1. Load ribbon correctly. See Load Ribbon on page 64. 2. Calibrate the sensors. See Calibrate Media and Ribbon Sensor Sensitivity on page 90. 1. Load media correctly. See Load Media on page 58. 2. Calibrate the sensors. See Calibrate Media and Ribbon Sensor Sensitivity on page 90. 1. Print a sensor profile. See Print Sensor Profile on page 89. The ribbon out threshold (marked by the word RIBBON) is likely too high, above the black area that indicates where the ribbon is detected. 2. Calibrate the sensors or load printer defaults. See Calibrate Media and Ribbon Sensor Sensitivity on page 90 or LOAD DEFAULTS on page 73. |
| Error code: | 03 |
| Display: | WARNING RIBBON IN |
| Description: | The ERROR light flashes. |
| Causes: | Ribbon is loaded, but the printer is set for direct thermal mode. |
| Remedy: | Ribbon is not required with direct thermal media. If you are using direct thermal media, remove the ribbon. This error message will not affect printing. If you are using thermal transfer media, which requires ribbon, set the printer for Thermal Transfer mode. See Select Print Method on page 81. |
| Error code: | 04 |
| Display: | ERROR CONDITION PAPER OUT |
| Description: | The printer stops; the ERROR light flashes. |
| Causes: | The media is not loaded or is loaded incorrectly. Misaligned media sensor. The printer is set for noncontinuous media, but continuous media is loaded. |
| Remedy: | Load media correctly. See Load Media on page 58. Check position of the media sensor. Install proper media type, or reset printer for current media type and perform calibration. |
| Error code: | 05 |
| Display: | ERROR CONDITION HEAD OPEN |
| Description: | The printer stops; the ERROR light flashes. |
| Causes: | The printhead is not fully closed. The head open sensor is not working properly. |
| Remedy: | Replace the sensor. |
| Error code: | 06 |
| Display: | THERMISTOR FAULT |
| Description: | The ERROR light flashes. |
| Causes: | The printhead has a faulty thermistor. |
| Remedy: | Replace the printhead. |
| Error code: | 07 |
| Display: | WARNING HEAD COLD, THERMISTOR FAULT, ERROR CONDITION HEAD ELEMENT BAD |
| Description: | The printer stops; the ERROR light is on; the printer cycles through these three messages. |
| Causes: | The printhead data cable is not properly connected. The printhead has a faulty thermistor. |
| Remedy: | Caution • Turn off (O) the printer before performing this procedure. Failure to do so can damage the printhead. 1. Turn off (O) the printer. 2. Disconnect and reconnect the data cable to the printhead. 3. Ensure that the cable connector is fully inserted into the printhead connector. 4. Turn on (I) the printer. Replace the printhead. |
| Error code: | 08 |
| Display: | WARNING HEAD COLD |
| Description: | The printer prints while the ERROR light flashes. |
| Causes: | The printhead temperature is approaching its lower operating limit. The printhead data cable is not properly connected. The printhead has a faulty thermistor. |
| Remedy: | Continue printing while the printhead reaches the correct operating temperature. If the error remains, the environment may be too cold for proper printing. Relocate the printer to a warmer area. Caution • Turn off (O) the printer before performing this procedure. Failure to do so can damage the printhead. 1. Turn off (O) the printer. 2. Disconnect and reconnect the data cable to the printhead. 3. Ensure that the cable connector is fully inserted into the printhead connector. 4. Turn on (I) the printer. Replace the printhead. |
| Error code: | 09 |
| Display: | WARNING HEAD TOO HOT |
| Description: | The printer stops; the ERROR light flashes. |
| Causes: | The printhead is over temperature. |
| Remedy: | Allow the printer to cool. Printing automatically resumes when the printhead elements cool to an acceptable operating temperature. |
| Error code: | 10 |
| Display: | DEFRAGMENTING |
| Description: | The printer stops. |
| Causes: | The printer is defragmenting memory. |
| Remedy: | Caution • Do NOT turn off the printer power during defragmenting. Doing so can damage the printer. Allow the printer to finish defragmenting. If you get this error message frequently, check your label formats. Formats that write to and erase memory frequently may cause the printer to defragment often. Using properly coded label formats usually minimizes the need for defragmenting. If this error message does not go away, contact Technical Support. The printer requires service. |
| Error code: | 11 |
| Display: | ERROR CONDITION CUTTER JAM |
| Description: | The printer stops; the ERROR light flashes. |
| Causes: | Caution • The cutter blade is sharp. Do not touch or rub the blade with your fingers. The cutter blade is in the media path. |
| Remedy: | Turn off the printer power and unplug the printer. Inspect the cutter module for debris and clean as needed following the cleaning instructions in Clean the Cutter Module on page 135. |
| Error code: | 12 |
| Description: | General print quality issues |
| Causes: | The printer is set at the incorrect print speed. You are using an incorrect combination of labels and ribbon for your application. The printer is set at an incorrect darkness level. The printhead is dirty. Incorrect or uneven printhead pressure. The printhead is improperly balanced. |
| Remedy: | For optimal print quality, set the print speed to the lowest possible setting for your application via control panel, the driver, or the software. See Adjust Print Speed on page 79. You may want to perform the FEED Self Test on page 120. 1. Switch to a different type of media or ribbon to try to find a compatible combination. 2. If necessary, consult your authorized Zebra reseller or distributor for information and advice. For optimal print quality, set the darkness to the lowest possible setting for your application via the control panel, the driver, or the software. See Adjust Print Darkness on page 78. You may want to perform the FEED Self Test on page 120 to determine the ideal darkness setting. Clean the printhead. See Clean the Printhead and Platen Roller on page 131. Set the printhead pressure to the minimum needed for good print quality. See Adjust Printhead Pressure on page 70. Adjust the printhead balance. |
| Error code: | 13 |
| Description: | Long tracks of missing print on several labels |
| Causes: | Print element damaged. |
| Remedy: | Replace the printhead. |
| Error code: | 14 |
| Description: | Wrinkled ribbon |
| Causes: | Ribbon fed through the machine incorrectly. Incorrect burn temperature. Incorrect or uneven printhead pressure. Media not feeding properly; walking from side to side. The strip plate needs adjusting. The printhead needs vertical adjustment. The printhead is improperly balanced. The printhead and platen roller need to be realigned. |
| Remedy: | See Load Ribbon on page 64. Set the darkness to the lowest possible setting for good print quality. See Adjust Print Darkness on page 78. Set the printhead pressure to the minimum needed for good print quality. See Adjust Printhead Pressure on page 70. Make sure that media is snug by adjusting the media guide, or call a service technician. Adjust the printhead balance. |
| Error code: | 15 |
| Description: | Printing too light or too dark over the entire label |
| Causes: | The media or ribbon is not designed for high-speed operation. You are using an incorrect combination of media and ribbon for your application. You are using ribbon with direct thermal media. Incorrect or uneven printhead pressure. |
| Remedy: | Replace supplies with those recommended for high-speed operation. 1. Switch to a different type of media or ribbon to try to find a compatible combination. 2. If necessary, consult your authorized Zebra reseller or distributor for information and advice. Direct thermal media does not require ribbon. To check if you are using direct thermal media, perform the label scratch test in When to Use Ribbon on page 62. Set the pressure to the minimum needed. See Adjust Printhead Pressure on page 70. |
| Error code: | 16 |
| Description: | Smudge marks on labels |
| Causes: | The media or ribbon is not designed for high-speed operation. |
| Remedy: | Replace supplies with those recommended for high-speed operation. |
| Error code: | 17 |
| Description: | Misregistration/skips labels |
| Causes: | The printer is not calibrated. Improper label format. |
| Remedy: | Recalibrate the printer. Use correct label format. |
| Error code: | 18 |
| Description: | Misregistration and misprint of one to three labels |
| Causes: | The platen roller is dirty. Media does not meet specifications. |
| Remedy: | See Clean the Printhead and Platen Roller on page 131. Use media that meets specifications. |
| Error code: | 19 |
| Description: | Vertical drift in top-of-form position |
| Causes: | The printer is out of calibration. Vertical drift occurs during normal printer operation. Note • A vertical drift of ± 4 to 6 dot rows (approximately 0.5 mm) is within normal tolerances. The platen roller is dirty. |
| Remedy: | Recalibrate the printer. Calibrate the printer. Clean the platen roller. See Clean the Printhead and Platen Roller on page 131. |
| Error code: | 20 |
| Description: | Vertical image or label drift |
| Causes: | The printer is using non-continuous labels but is configured in continuous mode. The media sensor is positioned incorrectly. The media sensor is calibrated improperly. The platen roller is dirty. Improper printhead pressure settings (toggles). Improperly loaded ribbon or media. Incompatible media. |
| Remedy: | Configure the printer for non-continuous and run calibration routine, if necessary. Ensure that the media sensor is properly positioned to read a single/consistent interlabel gap. See Calibrate Media and Ribbon Sensor Sensitivity on page 90. Clean the platen roller. See Clean the Printhead and Platen Roller on page 131. Adjust the printhead pressure to ensure proper functionality. Verify that the printer is loaded properly. Ensure that the interlabel gaps or notches are 2 to 4 mm and consistently placed. Media must not exceed minimum specifications for mode of operation. |
| Error code: | 21 |
| Description: | The bar code printed on a label does not scan. |
| Causes: | The bar code is not within specifications because the print is too light or too dark. Not enough blank space around the bar code. |
| Remedy: | Perform the FEED Self Test on page 120. Adjust the darkness or print speed settings as necessary. Leave at least 1/8 in. (3.2 mm) between the bar code and other printed areas on the label and between the bar code and the edge of the label. |
| Error code: | 22 |
| Description: | Loss of printing registration on labels. Excessive vertical drift in top-of-form registration. |
| Causes: | The platen roller is dirty. Media guides are positioned improperly. The media type is set incorrectly. The media is loaded incorrectly. |
| Remedy: | Clean the platen roller according to the instructions in Clean the Printhead and Platen Roller on page 131. Ensure that the media guides are properly positioned. Set the printer for the correct media type (gap/notch, continuous, or mark). See Set Media Type on page 81. Load media correctly. See Load Media on page 58. |
| Error code: | 23 |
| Description: | Auto Calibrate failed. |
| Causes: | Media or ribbon is loaded incorrectly. The sensors could not detect the media or ribbon. The sensors are dirty or positioned improperly. The sensors are dirty, or media is positioned improperly for the sensors to detect. The media type is set incorrectly. |
| Remedy: | Ensure that media and ribbon are loaded correctly. Manually calibrate the printer. See Calibrate Media and Ribbon Sensor Sensitivity on page 90. Ensure that the sensors are clean and that media is positioned properly. Set the printer for the correct media type (gap/notch, continuous, or mark). See Set Media Type on page 81. |
| Error code: | 24 |
| Description: | A label format was sent to the printer but was not recognized. The DATA light does not flash. |
| Causes: | The communication parameters are incorrect. |
| Remedy: | Check the printer driver or software communications settings (if applicable). If you are using serial communication, check the serial port setting in the control panel menu. See Set Serial Communications on page 91. If you are using serial communication, make sure you are using a null modem cable or a null modem adapter. Using the control panel controls, check the protocol setting. It should be set to NONE. See Set Protocol on page 93. If a driver is used, check the driver communication settings for your connection. |
| Error code: | 25 |
| Description: | A label format was sent to the printer. Several labels print, then the printer skips, misplaces, misses, or distorts the image on the label. |
| Causes: | The serial communication settings are incorrect. |
| Remedy: | Ensure that the flow control settings match. Check the communication cable length. See Table 5 on page 48 for requirements. Check the printer driver or software communications settings (if applicable). |
| Error code: | 26 |
| Description: | A label format was sent to the printer but was not recognized. The DATA light flashes but no printing occurs. |
| Causes: | The prefix and delimiter characters set in the printer do not match the ones in the label format. Incorrect data is being sent to the printer. |
| Remedy: | Verify the prefix and delimiter characters. See Set Format Prefix Character on page 94 and Set Delimiter Character on page 95 for the requirements. Check the communication settings on the computer. Ensure that they match the printer settings. If the problem continues, check the label format. |
| Error code: | 27 |
| Description: | Broken or melted ribbon |
| Causes: | Darkness setting too high. |
| Remedy: | 1. Reduce the darkness setting. 2. Clean the printhead thoroughly. |
| Error code: | 28 |
| Description: | The printer does not detect when the ribbon runs out. In thermal transfer mode, the printer did not detect the ribbon even though it is loaded correctly. |
| Causes: | The ribbon-out threshold is set too high to detect the ribbon. On a sensor profile, the ribbon-out threshold (circled in Figure 15) appears above the black bars that indicate the ribbon. This happens if you calibrate the printer without ribbon and later insert ribbon without recalibrating the printer or loading printer defaults. |
| Remedy: | 1. Print a sensor profile (see Print Sensor Profile on page 89), and note the location of the ribbon-out threshold (circled in Figure 15). 2. Calibrate the printer, this time using ribbon, or load printer defaults. See Calibrate Media and Ribbon Sensor Sensitivity on page 90 or LOAD DEFAULTS on page 73. Important • Loading defaults resets all printer parameters back to factory defaults. 3. Print another sensor profile, and compare it to the first one. 4. If the ribbon-out threshold is still too high, you may manually change the value. |
| Error code: | 29 |
| Description: | The ribbon light is on even though ribbon is loaded correctly. |
| Causes: | The printer was not calibrated for the label and ribbon being used. |
| Remedy: | Perform the calibration procedure in Calibrate Media and Ribbon Sensor Sensitivity on page 90. |
| Error code: | 30 |
| Description: | The LCD displays a language that I cannot read |
| Causes: | The language parameter was changed through the control panel or a firmware command. |
| Remedy: | 1. Press SETUP/EXIT to enter configuration mode. 2. Press MINUS (-). The printer displays the LANGUAGE parameter in the current language. Even if you cannot recognize the characters displayed, you can still scroll to another language. 3. Press SELECT to select the parameter. 4. Press PLUS (+) or MINUS (-) to scroll through the choices until you find a language that you can read. 5. Press SETUP/EXIT. The LCD displays SAVE CHANGES in the original language. 6. Press SETUP/EXIT again to exit configuration mode and save the changes (if the language does not change, you may need to scroll to a different save option by pressing PLUS (+) or MINUS (-) in the previous step). 7. Repeat this process, if necessary, until you reach the desired language. |
| Error code: | 31 |
| Description: | The LCD is missing characters or parts of characters |
| Causes: | The LCD may need replacing. |
| Remedy: | Run the Power-On Self Test on page 117 and check that the LCD display shows all characters. If not, replace the LCD. |
| Error code: | 32 |
| Description: | Changes in parameter settings did not take effect |
| Causes: | Parameters are set incorrectly. A command turned off the ability to change the parameter. A command changed the parameter back to the previous setting. If the problem continues, there may be a problem with the main logic board. |
| Remedy: | 1. Set parameters and save permanently. 2. Turn the printer off (O) and then on (I). Refer to the ZPL Programming Guide. Refer to the ZPL Programming Guide. Replace the main logic board. |
| Error code: | 33 |
| Description: | The printer fails to calibrate or detect the top of the label. |
| Causes: | The printer was not calibrated for the label being used. The printer is configured for continuous media. The driver or software configuration is not set correctly. |
| Remedy: | Perform the calibration procedure in Calibrate Media and Ribbon Sensor Sensitivity on page 90. Set the media type to noncontinuous media. See Set Media Type on page 81. Driver or software settings produce commands that can overwrite the printer configuration. Check the driver or software media-related setting. |
| Error code: | 34 |
| Description: | Non-continuous labels are being treated as continuous labels. |
| Causes: | The printer was not calibrated for the media being used. The printer is configured for continuous media. |
| Remedy: | Perform the calibration procedure in Calibrate Media and Ribbon Sensor Sensitivity on page 90. Set the media type to noncontinuous media. See Set Media Type on page 81. |
| Error code: | 35 |
| Description: | All lights are on, but nothing displays on the LCD, and the printer locks up. |
| Causes: | Internal electronic or firmware failure. |
| Remedy: | Turn the printer power off (O) and then on (I). If the printer locks up again, replace the main logic board. |
| Error code: | 36 |
| Description: | The printer locks up while running the Power-On Self Test. |
| Causes: | Main logic board failure. |
| Remedy: | Replace the main logic board. |
| Error code: | 37 |
| Description: | Non-continuous labels are being treated as continuous labels. |
| Causes: | The printer is configured for continuous media. The printer was not calibrated for the media being used. |
| Remedy: | Set the media type to noncontinuous media. See Set Media Type on page 56. Perform the calibration procedure in Calibrate Media and Ribbon Sensors on page 67. |
| Error code: | 38 |
| Description: | All lights are on, but nothing displays on the LCD, and the printer locks up. |
| Causes: | Internal electronic or firmware failure. |
| Remedy: | Turn the printer power Off (O) and then On (I). If the printer locks up again, replace the main logic board. |
| Error code: | 39 |
| Description: | The printer locks up while running the Power-On Self Test. |
| Causes: | Main logic board failure. |
| Remedy: | Replace the main logic board. |
| Error code: | 40 |
| Display: | Scanner locked |
| Description: | 10-348 ERROR 40 FUSER MAIN LAMP FAILURE Note If this failure reoccurs three times successively, an Engine NVRAM value is set preventing further printer use until the Clear Tech Rep Fault, Clear <10-348 & 10-350> is run. |
| Causes: | 1. Deformed paper sensor actuator or faulty sensor. 2. SMPS PBA or Main PBA is defective 3. Faulty cables or connectors. |
| Remedy: | Switch printer power OFF. Remove the Fuser Assembly. Warning Fuser may be very hot. Use extreme caution to prevent burns. Measure the resistance between the Fuser Assembly connector P600-4 and P600-6. Does the resistance measure between 20K and 100K ohms? Y↓N→ Replace the Fuser Assembly. Reinstall Fuser. Remove the Rear Cover, Rear Shield and the Rear Shield Bracket. Measure the resistance between P404A-1 and P404A-2 on the Engine Control Board. Does the resistance measure between 20K and 100K ohms? Y↓N→ Repair or replace the wiring harness between the Engine Control Board and the Fuser. Replace the Engine Control Board. |
| Error code: | 41 |
| Display: | Self Diagnostic LSU |
| Description: | Install or Reseat Fuser, Code 41 Front thermistor open error. This is a cold condition. Note If this failure reoccurs three times successively, an Engine NVRAM value is set preventing further printer use until the Clear Tech Rep Fault is performed. |
| Causes: | • Fuser • Engine Control Board |
| Remedy: | 1 1. Turn OFF power and remove the Fuser Assembly. 2. Measure the resistance between the fuser connector P600-4 and P600-6. 3. Does the resistance measure between 30 K and 190 K Ohms? Go to step 2. Replace the fuser assembly. 2 1. Reinstall the fuser assembly. 2. Enter service diagnostics. 3. From the Sensor Tests run the Fuser Temperature test. 4. Is the temperature indicated approximately 165o C? Replace the engine control board. Go to step 3. 3 1. Turn OFF printer power. 2. Check for an open circuit or poor connection between J600-4 to J600-6 to J404A-2. 3. Is the wiring OK? Replace the engine control board. Repair or replace the wiring harness. |
