
OKI MPS3537mc
Рейтинг


Модули
Plate-Assy-Side L
Eject-Assy
Flatbed-Unit
Cover-Assy-Top
Frame-Assy-FB
Guide-Assy-Retard
MFP-Unit
Plate-Assy-Base
Plate-Assy-Side R
Feeder-Assy-Regist
Frame-Assy-Top(Front)
Cover-Assy-Top-ADF
Cover-Assy-Front
ADF-Assy
ADF-Unit
Детали ADF-Unit
| Деталь: | Guide Assy.-Eject-L- |
| Парткод: | 44259703 |
| Деталь: | Lever-Exit-Sensor |
| Парткод: | 43101801 |
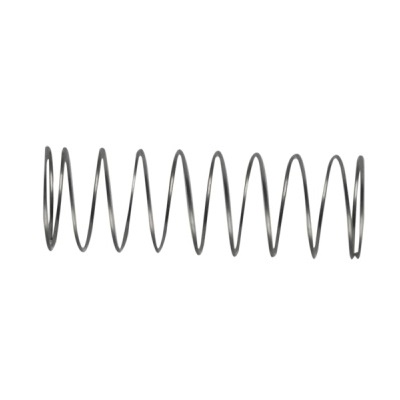
| Деталь: | Spring-SNS(F/R) |
| Парткод: | 40386501 |
| Деталь: | Ope-panel-unit |
| Парткод: | 45272001 |
| Деталь: | OR-Board-7SU |
| Парткод: | 45169401 |
| Деталь: | Handle-Scanner |
| Парткод: | 45054601 |
| Деталь: | Flatbed(mantenance kit) |
| Парткод: | 45484601 |
| Деталь: | Guide-Retard(Sub) |
| Парткод: | 45056401 |
| Деталь: | Rubber-Friction |
| Парткод: | 44533301 |
| Деталь: | Frame-Assy-Retard |
| Парткод: | 45060101 |
| Деталь: | Spring-Retard |
| Парткод: | 45046301 |
| Деталь: | Lever-Hopping |
| Парткод: | 45045801 |
| Деталь: | Guide-Exit(Lower) |
| Парткод: | 45046901 |
| Деталь: | LG248BL1 (6520414M0001) |
| Парткод: | 56128501 |
| Деталь: | Belt Unit (ODA) |
| Парткод: | 45381101 |
| Деталь: | Fuser-Unit(ODA_120V) |
| Парткод: | 45380001 |
| Деталь: | Fuser-Unit(ODA_230V) |
| Парткод: | 45380002 |
| Деталь: | OR-IBY |
| Парткод: | 44614101 |
| Деталь: | Sensor Assy.-Color-Regist |
| Парткод: | 43917501 |
| Деталь: | Cover-Driver |
| Парткод: | 42066901 |
| Деталь: | Board-Maintenance_MFP_CU |
| Парткод: | 45554901 |
| Деталь: | Board-Maintenance_MFP_CU |
| Парткод: | TBD |
| Деталь: | Eject-Assy. |
| Парткод: | 45268901 |
| Деталь: | PWR unit-DCDC |
| Парткод: | 43770701 |
| Деталь: | Cassette-Assy-PX757 |
| Парткод: | 43894903 |
| Деталь: | Frame-Assy-Retard |
| Парткод: | 43895001 |
| Деталь: | Spring-Retard |
| Парткод: | 43963101 |
| Деталь: | Cover Assy.-Hopping- |
| Парткод: | 44259903 |
| Деталь: | Cover Assy.-Front |
| Парткод: | 44263601 |
| Деталь: | Feeder-Assy.-Regist |
| Парткод: | 44261901 |
| Деталь: | Gear-Idle-Belt-Z20Z93 |
| Парткод: | 43076101 |
| Деталь: | LED Head Unit-51TRC |
| Парткод: | 45272301 |
| Деталь: | OR-Motor-FAN(80) |
| Парткод: | 43289101 |
| Деталь: | Power-Assy- |
| Парткод: | 45271601 |
| Деталь: | Thermistor-Belt |
| Парткод: | 42605201 |
| Деталь: | Shaft-LiftUp |
| Парткод: | 44555801 |
| Деталь: | Bush |
| Парткод: | 42060701 |
| Цена: | 750 ₽ |
| Деталь: | Gear-LiftupL-Z32 |
| Парткод: | 43075201 |
| Деталь: | Gear-LiftUpLinkL-Z56 |
| Парткод: | 43075501 |
| Деталь: | Unit-Duplex- |
| Парткод: | 44274404 |
| Деталь: | Cover-Assy-CS-PX741 |
| Парткод: | 43894701 |
| Деталь: | FAX Unit(US,CA) |
| Парткод: | 45036901 |
| Деталь: | Stapler_Unit |
| Парткод: | 45393501 |
| Деталь: | Motor-Fan(80) |
| Парткод: | 45163401 |
| Деталь: | CONN Cord-USB() |
| Парткод: | 45084101 |
| Деталь: | CONN Cord-JST3P-INLET() |
| Парткод: | 45271401 |
| Деталь: | Spring-PickUp |
| Парткод: | 43735001 |
| Деталь: | Bracket-Spring(Sub) |
| Парткод: | 40367101 |
| Деталь: | Plate-Hinge(FB) |
| Парткод: | 45037501 |
| Деталь: | Sleeve-Hinge(FB) |
| Парткод: | 45037601 |
| Деталь: | Slider-Hinge(FB) |
| Парткод: | 45037701 |
| Деталь: | Spring-Hinge(FB) |
| Парткод: | 45037801 |
| Деталь: | Shaft-Guide(Hinge) |
| Парткод: | 45038201 |
| Деталь: | Board-Maintenance MFP 7PU M MC |
| Парткод: | 45167401 |
| Деталь: | Board-Maintenance MFP_7PU_H_MC |
| Парткод: | 45167402 |
| Деталь: | Board-Maintenance MFP_7PU_M_MPS |
| Парткод: | 45167403 |
| Деталь: | Board-Maintenance MFP_7PU_H_MPS |
| Парткод: | 45167404 |
| Деталь: | 9715B-12Z02-G4C |
| Парткод: | 56740420 |
| Деталь: | Roller-Pick-Up |
| Парткод: | 42699401 |
| Деталь: | Roller-Feed-NOW |
| Парткод: | 43000601 |
| Деталь: | CLUTCH |
| Парткод: | 44261401 |
| Деталь: | HS12-0010 (2055150P40000 |
| Парткод: | 50425005 |
| Деталь: | OR-Motor_Pulse_Liftup |
| Парткод: | 43276201 |
| Деталь: | CONN Cord-AMP8P-AMP4PAMP4P |
| Парткод: | 43138001 |
| Деталь: | OR-Motor_Pulse_HOP |
| Парткод: | 43276301 |
| Деталь: | TW-VF/SMCD11-150-1.0 |
| Парткод: | 56737134 |
| Деталь: | OR-PRZ |
| Парткод: | 43131601 |
| Деталь: | CONN Cord-JST9P-JST10P |
| Парткод: | 45083801 |
| Деталь: | Motor-DC(F) |
| Парткод: | 44349601 |
| Деталь: | CONN Cord-JST9P-JST8P |
| Парткод: | 45084601 |
| Деталь: | Gear Assy.-HP |
| Парткод: | 44259301 |
| Деталь: | CONN Cord-AMP5PAMP5P |
| Парткод: | 44256101 |
| Деталь: | Board-RSF |
| Парткод: | 42135802 |
| Деталь: | CLUTCH |
| Парткод: | 44261401 |
| Деталь: | OR-MFH |
| Парткод: | 45169301 |
| Деталь: | Frame-Assy-Hopping-ADF |
| Парткод: | 45059801 |
| Деталь: | CLUTCH |
| Парткод: | 44261402 |
| Деталь: | Frame Assy.-Separator |
| Парткод: | 43922402 |
| Деталь: | Spring-Separator |
| Парткод: | 44009301 |
| Деталь: | Roller-Assy-MPT |
| Парткод: | 43922301 |
Коды ошибок
C020
C0A1
C0A2
C0A5
C0A6
C1DA, C1DB
C260
C270
C280
C291
C37A ... C37D
C3B3 ... C383
C3E2
C3EA ... C3ED
C41A, C41B
C41C
C41D
C41E
C449, C446
C44A
C468, C466
C46A, C46B
C4C0
C4E3
C4FA
C56A, C56B, C56C, C56D
C5A1
C5A2
C5A3
C5A4
C5A5
C5A6
C5B0
C5B2, C5B3, C5B4
C91A, C91B, C91C
C91D
C921
C940
C96A
C9A0
CE50
CE51
CE52
CE7A
CE82 ... CE85
E01A
E01B
E02A
E061 ... E065
E130
E13A
E140
E14A
E150
E15A
E160
E16A
E202
E20A
E400
E52A
E57A
E58A
E711
E712
E713
E714
E715
E721
E722
E723
E724
E725
E726
E727
E728
E741
E742
E743
E744
E778
E779
E870
F031
F032
F033
F034
F03A ... F03D
F041
F042
F072
F110
F111
F112
F113
F114
Описание
| Error code: | C020 |
| Description: | Image drum lock error |
| Causes: | The ID does not rotate normally. Does the error display recur when the power is turned off once and back on? |
| Remedy: | Check if the ID is installed normally or not. Replace the ID unit. Replace the ID motor. |
| Error code: | C0A1 |
| Description: | Fuser exhaust fan error |
| Causes: | Is the fan connector connected normally? Does this error recur? |
| Remedy: | Re-connect it normally. Replace the fan motor. Replace the PU board. |
| Error code: | C0A2 |
| Description: | Low voltage power supply fan error |
| Causes: | Is the fan (bottom right of the front) of the low voltage power supply block working? Is the fan connector connected normally? |
| Remedy: | Check for sure connection of the fan connector. Replace the PU board. Replace the fan motor. |
| Error code: | C0A5 |
| Description: | ID cooling fan error |
| Causes: | Is the fan connector connected normally? Does this error recur? |
| Remedy: | Re-connect it normally. Replace the fan motor. Replace the PU board. |
| Error code: | C0A6 |
| Description: | Duplex FAN Alarm Caution |
| Causes: | Fan error inside the Duplex unit. Does the error recur when the power is turned off once and back on? Does the error recur when the power is turned off once and back on? |
| Remedy: | Check if the Duplex unit is installed normally or not. Check if the fans are installed normally or not. Replace the fan. |
| Error code: | C1DA, C1DB |
| Description: | LCF unit detect error 1 LCF unit detect error 2 |
| Remedy: | Replace the LCF Unit Board |
| Error code: | C260 |
| Description: | Peak detection error: Lighting of the exposure lamp (white reference) is not detected when the power is turned ON. |
| Causes: | Lens unit SLG board Exposure lamp Supply harness |
| Remedy: | Does the exposure lamp light? (Perform the output check in the test mode: 03-267) ↓ → YES → 1. Check if the connectors on the CCD and SLG boards are disconnected. 2. Check if the shading correction plate is detached or dirty. 3. Check if the conductor pattern on the CCD board is short circuited or open circuited. 4. Check if the conductor pattern on the SLG board is short circuited or open circuited. 5. Replace the lens unit. 6. Replace the SLG board. NO 1. Check if the connectors of the exposure lamp and inverter are disconnected. 2. Check the SLG board if the connector pin CN1 is disconnected and the harness is short circuited or open circuited. 3. Check if the conductor pattern on the SLG board is short circuited or open circuited. 4. Replace the SLG board. 5. Replace the inverter. 6. Replace the exposure lamp. |
| Error code: | C270 |
| Description: | Carriage home position sensor not turning OFF within a specified period of time: The carriages do not shift from their home position within a specified period of time. |
| Causes: | Carriage home position sensor Carriage home position sensor harness SLG board Scan motor Scan motor harness |
| Remedy: | Remove the original glass and move the carriages to the paper feeding side. Turn ON the power and check the following items. Are the carriages slightly moved to the feeding direction? Are the carriages staying at a position other than home position? ll → YES → 1. Check if the conductor pattern on the SLG board is short circuited or open circuited. 2. Replace the SLG board. NO 1. Check if the connector pin is disconnected and the harness is short circuited or open circuited. 2. Check if the conductor pattern on the SLG board is short circuited or open circuited. 3. Replace the SLG board. |
| Error code: | C280 |
| Description: | Carriage home position sensor not turning ON within a specified period of time: The carriages do not reach their home position within a specified period of time. |
| Causes: | Carriage home position sensor Carriage home position sensor harness SLG board Scan motor Scan motor harness |
| Remedy: | Do the carriages make a big noise after they arrive at the home position? ↓ → YES → The carriage home position sensor is not turned ON. 1. Check if the connector of the sensor is disconnected. 2. Replace the carriage home position sensor. 3. Check if the conductor pattern on the SLG board is short circuited or open circuited. 4. Replace the SLG board. NO The carriages are stopped at the home position and do not move. 1. Check if the connector pins are disconnected and the harnesses are short circuited or open circuited. 2. Check if the conductor pattern on the SLG board is short circuited or open circuited. 3. Replace the SLG board. |
| Error code: | C291 |
| Description: | Scan position detect error |
| Causes: | Scan position detect error – The black edge is not detected in scanning. |
| Remedy: | Power cycle the unit and retry to scan. If the error occurs again in the next scan, the unit needs repair. The calibration sheet may not be installed properly. |
| Error code: | C37A ... C37D |
| Description: | Abnormal temperature of belt C37A: Shortcircuit C37B: Open circuit C37C: High temperature C37D: Low temperature |
| Causes: | Is the cable from belt thermistor to the high voltage board connected normally? Does this error recur? |
| Remedy: | Re-connect the cables normally. Turn on the power again. Replace the belt thermistsor. |
| Error code: | C3B3 ... C383 |
| Description: | Toner sensor detection error. (C3B3=Y, C3A3=M, C393=C, C383=K) This error does not occur with the default settings. |
| Causes: | Is the toner cartridge installed? Is the lock lever of the toner set? |
| Remedy: | Does this error recur? Install the toner cartridge. Rotate the lock lever of toner to the lock position. Turn on the power again. Replace the toner sensor assembly. |
| Error code: | C3E2 |
| Description: | The fuse has blown out. |
| Causes: | Is the belt unit connected normally? Does this error recur? |
| Remedy: | Re-install the belt unit. Turn on the power again. After checking for the sure cable connection, replace the PU or Board IBY. |
| Error code: | C3EA ... C3ED |
| Description: | The ID unit fuse has blown out. (C3EA=Y, C3EB=M, C3EC=C, C3ED=K) |
| Causes: | Is the ID unit installed normally? Does this error recur? |
| Remedy: | Does the printer recover from the error when the PU/PRZ board is replaced? Re-install the ID unit. Turn on the power again. After checking for the sure connection of the cable between PRZ board and PU board, replace the PRZ board. Replace the PU board. |
| Error code: | C41A, C41B |
| Description: | Short-circuit or opencircuit of fuser thermistor is detected. |
| Causes: | Does this error recur? |
| Remedy: | Turn on the power again. Replace the fuser unit. |
| Error code: | C41C |
| Description: | The backup roller thermistor is detected of its short-circuit. (At high temperature) |
| Causes: | Does this error recur? |
| Remedy: | Turn on the power again. Replace the fuser unit. |
| Error code: | C41D |
| Description: | The backup roller thermistor is detected of its opencircuit. (At low temperature) |
| Causes: | Does this error recur? |
| Remedy: | Turn on the power again. Replace the fuser unit. |
| Error code: | C41E |
| Description: | Compensation Thermistor Error |
| Causes: | Is the error message displayed? Does this error recur? |
| Remedy: | Turn on the power again. After leaving a printer for 30 minutes, turn on the power again. |
| Error code: | C449, C446 |
| Description: | The fuser thermistor has detected an abnormal temperature (high temperature or low temperature.) |
| Causes: | Does this error recur? Does this error recur? |
| Remedy: | Turn on the power again. Replace the fuser unit. Replace the low voltage power supply unit. |
| Error code: | C44A |
| Description: | Thermistor Slope Error |
| Causes: | Is the error message displayed? Does this error recur? |
| Remedy: | Turn on the power again. After leaving a printer for 30 minutes, turn on the power again. |
| Error code: | C468, C466 |
| Description: | The backup roller thermistor has detected an abnormal temperature (high temperature or low temperature.) |
| Causes: | Does this error recur? Does this error recur? |
| Remedy: | Turn on the power again. Replace the fuser unit. Replace the low voltage power supply unit. |
| Error code: | C46A, C46B |
| Description: | Compensation Heater Temp high Compensation Heater Temp Low |
| Remedy: | Turn on the power,after 30min. |
| Error code: | C4C0 |
| Description: | The fuse has blown out. |
| Causes: | Is the fuser unit installed normally? Does this error recur? |
| Remedy: | After cleaning the connecting connector of the fuser unit, re-install the fuser unit. Turn on the power again. After checking for the sure cable connection, replace the PU or Board IBY. |
| Error code: | C4E3 |
| Description: | Fuser motor rotation abnormality |
| Causes: | Fuser does not rotate normally. Does this error recur? |
| Error code: | C4FA |
| Description: | Media wrapped around the fuser error |
| Causes: | Media has wrapped around the fuser. |
| Remedy: | Turn off the power. Replace the fuser. |
| Error code: | C56A, C56B, C56C, C56D |
| Description: | Option unit I/F error (C56A=Duplex Unit, C56B=2nd Tray, C56C=3rd Tray C56D=4th Tray) |
| Causes: | Does this error recur? |
| Remedy: | Turn on the power again. Check for sure connection of the connectors. Replace the option unit. |
| Error code: | C5A1 |
| Description: | NVRAM data abnormality (LGC board) |
| Causes: | SRAM board LGC board |
| Remedy: | (1) Check if the NVRAM has been installed properly. (2) Check if the conductor patterns on the NVRAM is short circuited or open circuited. (3) Replace the NVRAM. (4) Replace the LGC board. |
| Error code: | C5A2 |
| Description: | Duplex Software Error |
| Remedy: | Replace the Duplex Unit |
| Error code: | C5A3 |
| Description: | Tray3 Software Error |
| Remedy: | Change the Tray3 Board |
| Error code: | C5A4 |
| Description: | Tray2 Software Error |
| Remedy: | Change the Tray2 Board |
| Error code: | C5A5 |
| Description: | Software Error |
| Remedy: | Change the PU Board |
| Error code: | C5A6 |
| Description: | Tray4 Software Error |
| Remedy: | Change the Tray4 Board |
| Error code: | C5B0 |
| Description: | Duplex Clock Adjust Error |
| Remedy: | Change the Duplex |
| Error code: | C5B2, C5B3, C5B4 |
| Description: | Tray-2/3/4 CPU clock frequency error |
| Causes: | C5B2=2nd Tray C5B3=3rd Tray C5B4=4th Tray |
| Remedy: | Replace the Tray board GOH-12. |
| Error code: | C91A, C91B, C91C |
| Description: | RFID reader I/F erro |
| Causes: | Interface error with the RFID reader is detected. 01: Communication error between the RFID reader and the engine circuit boards. 02: Error in the wireless circuit of the RFID reader 03: Communication error between the RFID reader and the toner cartridge. 04: Error is detected in the RFID toner cartridge. (In more than 4) |
| Remedy: | 01: Same as the error no. C91D 02: Replace the RFID R/W board. 03: Check for normal connection of the antenna cable. 04: Check if quantity of the toner cartridge is correct or not. |
| Error code: | C91D |
| Description: | RFID Reader not Installed |
| Causes: | RFID read device error Does this error recur? |
| Remedy: | Check for normal connection of the RFID R/W board. Replace the RFID R/W. Replace the PU board. |
| Error code: | C921 |
| Description: | AC voltage zero-crossing error |
| Remedy: | C h e ck t h e AC voltage. Change the Lowvoltage board or PU board. |
| Error code: | C940 |
| Description: | Engine-CPU abnormality |
| Causes: | LGC board |
| Remedy: | Is the “Call for Service” displayed even after the power is turned OFF and back ON? → NO → Leave it and see what happens. YES 1. Check if the circuit pattern between the Engine-CPU and FROM is short circuited or open circuited. 2. Replace the LGC board if this error occurs frequently. |
| Error code: | C96A |
| Description: | High voltage power supply interface error. |
| Causes: | Is the cable connecting the PU board to the high voltage unit connected normally? Have you checked defective contact of contactor points? |
| Remedy: | Re-connect them normally. Check for defective contact of the high voltage system. Replace the high voltage power supply. |
| Error code: | C9A0 |
| Description: | Offline stapler error |
| Remedy: | Change the offline stapler |
| Error code: | CE50 |
| Description: | Temperature/humidity sensor abnormality: The output value of the temperature/humidity sensor is out of the specified range. |
| Causes: | Temperature/humidity sensor LGC board |
| Remedy: | Is the connector CN338 on the LGC board or the connector of the temperature/humidity sensor (S7) disconnected? Is the harness between the LGC board and the temperature/humidity sensor disconnected? → YES → Connect the connector securely. Replace the harness. NO 1. Check the connection of the KEY board and DSP board. 2. Check the connection of the DSP board and LGC board. 3. Replace the temperature/humidity sensor. 4. Replace the LGC board. |
| Error code: | CE51 |
| Description: | Environment humidity is abnormal./ Humidity sensor is not connected. |
| Causes: | Does this error recur? |
| Remedy: | Yes Turn off the power of the printer and back on. Replace the Board 8TH. |
| Error code: | CE52 |
| Description: | Dew condensation of the printer is detected. |
| Causes: | This error can easily occur when a printer is brought in to indoor from outdoor. Leave the printer for 2 hours or half day under room temperature, and turn on the power again. Does this error recur? |
| Remedy: | Yes After leaving a printer under room temperature, turn on the power again. Replace the Board 8TH. |
| Error code: | CE7A |
| Description: | ID Up/Down position detection error |
| Causes: | Is the ID unit caught by anything when it is removed and reinstalled? Does this error recur? |
| Remedy: | Re-install the ID unit. Turn on the power again. Replace the high voltage power supply. |
| Error code: | CE82 ... CE85 |
| Description: | LED head detection error (CE82=Y, CE83=M, CE84=C, CE85=K) |
| Causes: | Is the LED head connected normally? Is the LED HEAD fuse brown? Does this error recur? |
| Remedy: | Install the LED head unit normally. Check the LED HEAD fuse. After checking fuse Turn on the power again. For the method of checking the LED head unit fuse, |
| Error code: | E01A |
| Description: | Occur jam and Paper on the Transport Path |
| Remedy: | Take out the jammed paper. Change the sensor Lever. Change the PU board. |
| Error code: | E01B |
| Description: | Occur jam around Fuser Unit |
| Remedy: | Take out the jammed paper. Change the sensor Lever. Change the PU board. |
| Error code: | E02A |
| Description: | Occur jam and Paper on the Exit Path |
| Remedy: | Take out the jammed paper. Change the sensor Lever. Change the PU board. |
| Error code: | E061 ... E065 |
| Description: | Tray1 check paper size error Tray2 check paper size error Tray3 check paper size error Tray4 check paper size error MP Tray check paper size error |
| Remedy: | Change the paper size or change the paper in Tray. |
| Error code: | E130 |
| Description: | 1st drawer misfeeding (paper not reaching 1st drawer feed sensor): Paper does not reach the 1st drawer feed sensor during the feeding at the 1st drawer. |
| Causes: | 1st drawer feed sensor Feed motor PFC roller Rollers |
| Remedy: | Open the feed cover. Is there any paper in front of the 1st drawer transport sensor? → YES → Remove the paper. NO Is the 1st drawer feed sensor working? (Perform the input check in the test mode: 03-[FAX]OFF/[1]/[D]) ↓ → NO → 1. Check if the connector of the 1st drawer feed sensor is disconnected. 2. Check if the connector CN329 on the LGC board is disconnected. 3. Check if the connector pins are disconnected and the harnesses are open circuited. 4. Check if the conductor pattern on the LGC board is short circuited or open circuited. 5. Replace the 1st drawer feed sensor. 6. Replace the LGC board. YES Is the width of the side guides of the 1st drawer too narrow? Is there any paper skewing? → YES → Fit the width of the original guide to that of the paper. NO Is the 1st drawer feed clutch working? (Perform the output check in the test mode: 03-201) ↓ → NO → 1. Check if the connector of the 1st drawer feed clutch is disconnected. 2. Check if the connector CN329 on the LGC board is disconnected. 3. Check if the connector pins are disconnected and the harnesses are open circuited. 4. Check if the conductor pattern on the LGC board is short circuited or open circuited. 5. Replace the 1st drawer feed clutch. 6. Replace the LGC board. YES Check the 1st drawer feed roller, separation roller and pickup roller. Clean or replace them. * Check if the paper weight is within the specified range. |
| Error code: | E13A |
| Description: | Tray1 paper remaining |
| Remedy: | Take out the jammed paper. Change the sensor Lever. Change the PU board. |
| Error code: | E140 |
| Description: | 2nd drawer misfeeding (paper not reaching 2nd drawer feed sensor): Paper does not reach the 2nd drawer feed sensor during the feeding at the 2nd drawer. |
| Causes: | 2nd drawer feed sensor Feed motor PFC roller Rollers |
| Remedy: | Open the drawer feed cover. Is there any paper in front of the 2nd drawer transport sensor? → YES → Remove the paper. NO Is the 2nd drawer transport sensor working? (Perform the input check in the test mode: 03-[FAX]OFF/[2]/[D]) ↓ → NO → 1. Check if the connector of the 2nd drawer feed sensor is disconnected. 2. Check if the connector CN329 on the LGC board is disconnected. 3. Check if the connector pins are disconnected and the harnesses are open circuited. 4. Check if the conductor pattern on the LGC board is short circuited or open circuited. 5. Replace the 2nd drawer feed sensor. 6. Replace the LGC board. YES Is the width of the side guides of the 2nd drawer too narrow? Is there any paper skewing? → YES → Fit the width of the original guide to that of the paper. NO Is the 2nd drawer feed clutch working? (Perform the output check in the test mode: 03-202) ↓ → NO → 1. Check if the connector of the 2nd drawer feed clutch is disconnected. 2. Check if the connector CN329 on the LGC board is disconnected. 3. Check if the connector pins are disconnected and the harnesses are open circuited. 4. Check if the conductor pattern on the LGC board is short circuited or open circuited. 5. Replace the 2nd drawer feed clutch. 6. Replace the LGC board. YES Check the 2nd drawer feed roller, separation roller and pickup roller. Clean or replace them. * Check if the paper weight is within the specified range. |
| Error code: | E14A |
| Description: | Occur jam and Paper on the Tray2 |
| Remedy: | Take out the jammed paper. Change the sensor Lever. Change the Tray2 board. |
| Error code: | E150 |
| Description: | 3rd drawer misfeeding (paper not reaching 3rd drawer / Tandem LCF feed sensor): Paper does not reach the 3rd drawer / Tandem LCF feed sensor during the feeding at the 3rd drawer. |
| Causes: | 3rd drawer feed sensor Feed/transfer motor PFC roller Rollers 3rd drawer feed clutch |
| Remedy: | Open the feed cover. Is there any paper in front of the 3rd drawer / Tandem LCF feed sensor? → YES → Remove the paper. NO Is the 3rd drawer / Tandem LCF feed sensor working? (Perform the input check in the test mode: 03-[FAX]OFF/[3]/[D]) ↓ → NO → 1. Check if the connector of the 3rd drawer / Tandem LCF feed sensor is disconnected. 2. Check if the connector CN328 on the LGC board is disconnected. 3. Check if the connector pins are disconnected and the harnesses are open circuited. 4. Check if the conductor patterns on the PFP board and LGC board are short circuited or open circuited. 5. Replace the 3rd drawer / Tandem LCF feed sensor. 6. Replace the LGC board. YES Is the width of the side guides of the 3rd drawer too narrow? Is there any paper skewing? → YES → Fit the width of the original guide to that of the paper. NO Is the 3rd drawer / Tandem LCF feed clutch working? (Perform the output check in the test mode: 03-209 (Tandem LCF model) and 03-226 (4th drawer model)) ↓ → NO → 1. Check if the connector of the 3rd drawer / Tandem LCF feed clutch is disconnected. 2. Check if the connector CN328 on the LGC board is disconnected. 3. Check if the connector pins are disconnected and the harnesses are open circuited. 4. Check if the conductor patterns on the PFP board and LGC board are short circuited or open circuited. 5. Replace the 3rd drawer / Tandem LCF feed clutch. 6. Replace the LGC board. YES Check the 3rd drawer / Tandem LCF feed roller, separation roller and pickup roller. Clean or replace them. * Check if the paper weight is within the specified range. |
| Error code: | E15A |
| Description: | Occur jam and Paper on the Tray3 |
| Remedy: | Take out the jammed paper. Change the sensor Lever. Change the Tray3 board. |
| Error code: | E160 |
| Description: | 4th drawer misfeeding (paper not reaching 4th drawer feed sensor): Paper does not reach the 4th drawer feed sensor during the feeding at the 4th drawer. |
| Causes: | 4th drawer feed sensor Feed/transfer motor PFC roller Rollers 4th drawer feed clutch |
| Remedy: | Open the feed cover. Is there any paper in front of the 4th drawer feed sensor? → YES → Remove the paper. NO Is the 4th drawer feed sensor working? (Perform the input check in the test mode: 03-[FAX]OFF/[4]/[D]) ↓ → NO → 1. Check if the connector of the 4th drawer feed sensor is disconnected. 2. Check if the connector CN350 on the LGC board is disconnected. 3. Check if the connector pins are disconnected and the harnesses are open circuited. 4. Check if the conductor patterns on the PFP board and LGC board are short circuited or open circuited. 5. Replace the 4th drawer feed sensor. 6. Replace the LGC board. YES Is the width of the side guides of the 4th drawer too narrow? Is there any paper skewing? → YES → Fit the width of the original guide to that of the paper. NO Is the 4th drawer feed clutch working? (Perform the output check in the test mode: 03-228) ↓ → NO → 1. Check if the connector of the 4th drawer feed clutch is disconnected. 2. Check if the connector CN350 on the LGC board is disconnected. 3. Check if the connector pins are disconnected and the harnesses are open circuited. 4. Check if the conductor patterns on the PFP board and LGC board are short circuited or open circuited. 5. Replace the 4th drawer feed clutch. 6. Replace the LGC board. YES Check the 4th drawer feed roller, separation roller and pickup roller. Clean or replace them. * Check if the paper weight is within the specified range. |
| Error code: | E16A |
| Description: | Occur jam and Paper on the Tray4 |
| Remedy: | Take out the jammed paper. Change the sensor Lever. Change the Tray4 board. |
| Error code: | E202 |
| Description: | Paper feed jam |
| Remedy: | Take out the jammed paper. Change the sensor Lever. Change the PU board. |
| Error code: | E20A |
| Description: | Occur jam and Paper on the Feed Path |
| Remedy: | Take out the jammed paper. Change the sensor Lever. Change the PU board. |
| Error code: | E400 |
| Display: | Print Unable E4 Turn the power off and then back on again. |
| Description: | Duplexing unit open jam |
| Causes: | Fuse LGC board Switching regulator Interlock switch |
| Remedy: | 1. Close the duplexing unit if it is opened. Remove if there is any paper before closing it. 2. Is the voltage of 24V being supplied from the power supply unit? (Perform the input check: 03- [COPY] ON/[6]/[A]) 3. Check if the connector CN309 on the LGC board is disconnected from the connector CN403 on the switching regulator or the harnesses are open circuited. Correct if any. 4. Check if the fuse (F201, F202, F203, and F204) on the switching regulator has blown. 5. Replace the PFC board. 6. Replace the switching regulator. 7. Is the interlock switch working properly? (Perform the input check: 03-[SCAN] ON/[4]/[G]) 8. Check if the connector CN312 on the LGC board is disconnected from the interlock switch or the harnesses are open circuited. Correct if any. |
| Error code: | E52A |
| Description: | Occur Duplex jam and Paper on the Transport Path |
| Remedy: | Take out the jammed paper. Change the sensor Lever. Change the Duplex board. |
| Error code: | E57A |
| Description: | Occur Duplex jam and Paper on the Entry Path |
| Remedy: | Take out the jammed paper. Change the sensor Lever. Change the Duplex board. |
| Error code: | E58A |
| Description: | Occur Duplex jam and Paper on the Reversal Path |
| Error code: | E711 |
| Description: | Original not reaching original length detection sensor: An original fed out of the original feeding tray does not reach the original length detection sensor. |
| Remedy: | Are the pickup roller, feed roller and separation roller stained or worn out? ↓ YES → Clean the rollers or replace them. NO Is the transport force of the rollers insufficient? ↓ YES → Replace the rollers. NO Is the original excessively curled or folded? ↓ NO → Replace the rollers. YES Flatten and set it again. |
| Error code: | E712 |
| Description: | Jam not reaching the original registration sensor: The original fed from the original feeding tray does not reach the original registration sensor. |
| Causes: | Original registration sensor Original pickup solenoid RADF board Perform the 05-3210 Roller Pickup roller, feed roller, separation roller |
| Remedy: | 1. Clean the pickup roller, feed roller and separation roller if they are stained. 2. Flatten the original if it is folded or excessively curled and place it again. 3. Is the original registration sensor working? (Perform the input check: 03-[FAX]ON/[7]/[H]) * If it is working properly, proceed to 7. If not, check 3 to 6. 4. Check if the connector CN74 on the RADF board is disconnected from the original registration sensor or the harnesses are open circuited. Correct if any. 5. Replace the original registration sensor. 6. Replace the RADF board, and then perform the automatic adjustment for the original reading start sensor (05-356). 7. Replace the pickup roller, feed roller and separation roller if they are worn out. |
| Error code: | E713 |
| Description: | Original stopping at original length detection sensor: The trailing edge of the original does not pass the original length detection sensor after its leading edge has reached the original length detection sensor. |
| Remedy: | Are the registration roller, read roller and exit roller stained? ↓ YES Clean the rollers |
| Error code: | E714 |
| Description: | Feed signal reception jam: The feed signal is received even no original exists on the original feeding tray. |
| Causes: | Original empty sensor RADF board Perform the 05-3210 Roller Pickup roller, feed roller, separation roller |
| Remedy: | 1. Is the original empty sensor working? (Perform the input check: 03-[FAX]ON/[7]/[B]) 2. Check if the lever of original empty sensor is working normally. 3. Check if the connector CN74 on the RADF board is disconnected from the original empty sensor or the harnesses are open circuited. Correct if any. 4. Replace the original empty sensor. 5. Replace the RADF board, and then perform the automatic adjustment for the original reading start sensor (05-356). |
| Error code: | E715 |
| Description: | Tray lifting movement time-out: The lifting tray does not reach the lifting tray upper limit detection sensor. |
| Remedy: | Is there any foreign matter which interrupts lifting or lowering the tray? ↓ YES → Remove the foreign matter. NO Is the connector of the tray lift motor or the connector CN5 on the ADF board disconnected? ↓ YES → Reconnect the connector. NO Is the harness connecting the ADF board and tray lift motor open circuited? ↓ YES → Replace the harness. NO Is the connector CN12 or CN15 on the ADF board disconnected? ↓ YES → Reconnect the connector. NO Are the harnesses connecting the ADF board and the lifting tray upper limit detection sensor or the lifting tray lower limit detection sensor open circuited? ↓ YES → Replace the harness. NO Replace the ADF board. |
| Error code: | E721 |
| Description: | Jam not reaching the original reading start sensor: The original does not reach the original reading start sensor after it has passed the original registration sensor (when scanning obverse side) or the reverse sensor (when scanning reverse side). |
| Causes: | Original reading start sensor RADF board Perform the 05-3210 Roller Registration roller, Read roller |
| Remedy: | 1. Clean the original registration roller, intermediate transfer roller, reading start roller, reverse roller and reverse registration roller if they are stained. 2. Is the original reading start sensor working? (Perform the input check: 03-[FAX]ON/[7]/[G]) * If it is working properly, proceed to 8. If not, check 3 to 7 below. 3. Check if the connector CN75 on the RADF board is disconnected from the original reading start sensor or the harnesses are open circuited. Correct if any. 4. Perform the automatic adjustment of the original reading start sensor (05-356). 5. Perform the manual adjustment of the original reading start sensor. 6. Replace the original reading sensor, and then perform the automatic adjustment of the original reading start sensor (05-356). 7. Replace the RADF board, and then perform the automatic adjustment for the original reading start sensor (05-356). 8. Replace the original registration roller, intermediate transfer roller, reading start roller, reverse roller and reverse registration roller if they are worn out. |
| Error code: | E722 |
| Description: | Jam not reaching the original exit sensor (during scanning): The original which passed the read sensor does not reach the original exit sensor when it is transported from the scanning section to exit section. |
| Causes: | Original exit sensor RADF board Perform the 05-3210 Roller |
| Remedy: | 1. Clean the reading end roller and the exit intermediate roller if they are stained. 2. Is the original exit sensor working? (Perform the input check: 03-[FAX]ON/[7]/[E]) * If it is working properly, proceed to 6. If not, check 3 to 5 below. 3. Check if the connector CN75 on the RADF board is disconnected from the original exit sensor or the harnesses are open circuited. Correct if any. 4. Replace the original exit sensor 5. Replace the RADF board, and then perform the automatic adjustment for the original reading start sensor (05-356). 6. Replace the reading end roller and the exit intermediate roller if they are worn out. |
| Error code: | E723 |
| Description: | Original not reaching small original reverse sensor (during scanning): An original which has passed the read sensor does not reach the small original reverse sensor when this original is transported from the scanning section to the reverse section. |
| Remedy: | Are the registration roller, read roller and small original reverse roller stained? ↓ YES → Clean the rollers. NO Are the small original exit flapper and small original reverse flapper operating normally? ↓ NO Adjust the small original exit solenoid. |
| Error code: | E724 |
| Description: | Stop jam at the original registration sensor: The trailing edge of the original does not pass the original registration sensor after its leading edge has reached this sensor. |
| Causes: | Original registration sensor RADF board Perform the 05-3210 Roller |
| Remedy: | 1. Clean the original registration roller if it is stained. 2. Is the original registration sensor working? (Perform the input check: 03-[FAX]ON/[7]/[H]) * If it is working properly, proceed to 6. If not, check 3 to 5 below. 3. Check if the connector CN74 on the RADF board is disconnected from the original registration sensor or the harnesses are open circuited. Correct if any. 4. Replace the original registration sensor. 5. Replace the RADF board, and then perform the automatic adjustment for the original reading start sensor (05-356). 6. Replace the original registration roller if it is worn out. |
| Error code: | E725 |
| Description: | Stop jam at the reading start sensor: The trailing edge of the original does not pass the read sensor after its leading edge has reached this sensor. |
| Causes: | Original reading start sensor RADF board Perform the 05-3210 Roller Registration roller, Read roller |
| Remedy: | 1. Clean the original registration roller, intermediate transfer roller, reading start roller, reverse roller and reverse registration roller if they are stained. 2. Is the original reading start sensor working? (Perform the input check: 03-[FAX]ON/[7]/[G]) * If it is working properly, proceed to 8. If not, check 3 to 7 below. 3. Check if the connector CN75 on the RADF board is disconnected from the original reading start sensor or the harnesses are open circuited. Correct if any. 4. Perform the automatic adjustment of the original reading start sensor (05-356). 5. Perform the manual adjustment of the original reading start sensor. 6. Replace the original reading sensor, and then perform the automatic adjustment of the original reading start sensor (05-356). 7. Replace the RADF board, and then perform the automatic adjustment for the original reading start sensor (05-356). 8. Replace the original registration roller, intermediate transfer roller, reading start roller, reverse roller and reverse registration roller if they are worn out. |
| Error code: | E726 |
| Description: | Transport/exit signal reception jam during ADF standby status |
| Remedy: | 1. Check if there is any paper in the RADF. Remove it if there is. 2. Check if there is any paper in the equipment. Remove it if there is. 3. If a jam still occurs, turn the power OFF and then back ON to check if the equipment operates normally. |
| Error code: | E727 |
| Description: | Jam not reaching the original reading end sensor |
| Causes: | Original reading end sensor RADF board Perform the 05-3210 Roller Read end roller |
| Remedy: | 1. Check the RADF position adjustment. "3.12.1 RADF position adjustment" 2. Check the Adjustment of the Reversing Automatic Document Feeder (RADF). "3.12 Adjustment of the RADF" 3. Clean the reading start roller and the reading end roller if they are stained. 4. Is the original reading end sensor working? (Perform the input check: 03-[FAX]ON/[5]/[D]) * If it is working properly, proceed to 8. If not, check 5 to 7 below. 5. Check if the connector CN75 on the RADF board is disconnected from the original read end sensor or the harnesses are open-circuited. Correct if this is the case. 6. Replace the original reading end sensor. 7. Replace the RADF board, and then perform the automatic adjustment for the original reading start sensor (05-356). 8. Replace the reading start roller and the reading end roller if they are worn out. |
| Error code: | E728 |
| Description: | Original not reaching small original exit sensor (during scanning): An original which has passed the read sensor does not reach the small original exit sensor when this original is transported from the scanning section to the exit section. |
| Remedy: | Are the registration roller, read roller and small original reverse roller stained? ↓ YES → Clean the rollers. NO Are the small original exit flapper and small original reverse flapper operating normally? ↓ NO Adjust the small original exit solenoid. |
| Error code: | E741 |
| Description: | Original stopping at small original reverse sensor: The trailing edge of the original does not pass the small original reverse sensor after its leading edge has reached the small original reverse sensor. |
| Remedy: | Are the registration roller, read roller and small original reverse roller stained? ↓ YES → Clean the rollers. NO Are the small original exit flapper and small original reverse flapper operating normally? ↓ NO Adjust the small original exit solenoid. |
| Error code: | E742 |
| Description: | Original not reaching small original reverse sensor (during reverse feeding): The leading edge of the original does not reach the small original reverse sensor when this original is fed out of the reverse section. |
| Remedy: | Are the registration roller, read roller and small original reverse roller stained? ↓ YES → Clean the rollers. NO Are the small original exit flapper and small original reverse flapper operating normally? ↓ NO Adjust the small original exit solenoid. |
| Error code: | E743 |
| Description: | Original not reaching small original exit sensor (during reverse feeding): An original which has passed the small original reverse sensor does not reach the small original exit sensor when this original is exited out of the reverse section. |
| Remedy: | Are the registration roller, read roller and small original reverse roller stained? ↓ YES → Clean the rollers. NO Are the small original exit flapper and small original reverse flapper operating normally? ↓ NO Adjust the small original exit solenoid. |
| Error code: | E744 |
| Description: | Stop jam at the original exit/reverse sensor |
| Causes: | Original exit/reverse sensor RADF board Perform the 05-3210 Roller Intermediate transport roller |
| Remedy: | 1. Clean the exit/reverse intermediate roller if it is stained. 2. Is the original exit/reverse sensor working? (Perform input check: 03: [FAX]/ON/[5]/[B]) * If it is working properly, proceed to 6. If not, check 3 to 5 below. 3. Check if the connector CN75 on the RADF board is disconnected from the original exit/reverse sensor or the harnesses are open-circuited. Correct if this is the case. 4. Replace the original exit/reverse sensor. 5. Replace the RADF board, and then perform the automatic adjustment for the original reading start sensor (05-356). 6. Replace the exit/reverse intermediate roller, if it is worn out. |
| Error code: | E778 |
| Description: | Remaining document detection at power on – A sensor other than the document set sensor becomes active when the power is turned on or the cover is opened and closed during operation. |
| Remedy: | Open the ADF cover, remove every jammed document from the paper feed path, and close the ADF cover. |
| Error code: | E779 |
| Description: | Activation of only the document set sensor – Only the document set sensor becomes active at initialization of the ADF stopper gate. |
| Remedy: | Open the ADF cover, remove every jammed document from the paper feed path, and close the ADF cover. |
| Error code: | E870 |
| Description: | RADF open jam: RADF has opened during RADF operation. |
| Causes: | RADF opening/closing sensor RADF board Perform the 05-3210 |
| Remedy: | 1. Close the RADF if it is opened. Remove if there is any original before closing it. 2. Is the RADF opening/closing sensor working? (Perform the input check: 03-[FAX]ON/[7]/[D]) * If it is working properly, proceed to 6. If not, check 3 to 5 below. 3. Check if the connector CN75 on the RADF board is disconnected from the RADF opening/ closing sensor or the harnesses are open circuited. Correct if any. 4. Replace the RADF opening/closing sensor. 5. Replace the RADF board, and then perform the automatic adjustment for the original reading start sensor (05-356). 6. Is the RADF opening/closing sensor adjusted within the specified range? |
| Error code: | F031 |
| Description: | Duplex unit for other model is detected. |
| Causes: | Is the Duplex unit for that specific model installed? |
| Remedy: | No Install the correct duplex unit. |
| Error code: | F032 |
| Description: | 3rd tray for other model is detected. |
| Causes: | Is the 3rd tray for that specific model installed? |
| Remedy: | No Install the correct 3rd tray. |
| Error code: | F033 |
| Description: | 2nd tray for other model is detected. |
| Causes: | Is the 2nd tray for that specific model installed? |
| Remedy: | No Install the correct 2nd tray. |
| Error code: | F034 |
| Description: | Tray4 version error |
| Remedy: | Change the Tray4 board |
| Error code: | F03A ... F03D |
| Description: | Detection of an unsupported toner cartridge |
| Causes: | An unsupported toner cartridge has been detected. F03A:Black toner cartridge position F03B:Yellow toner cartridge position F03C:Magenta toner cartridge position F03D:Cyan toner cartridge position |
| Remedy: | Replace it with an appropriate toner cartridge. |
| Error code: | F041 |
| Description: | Over than available setting number tray detection error |
| Causes: | Over than available setting number tray is installed. |
| Remedy: | Remove the available setting number tray. |
| Error code: | F042 |
| Description: | Error due to detection of the toner cartridges of the same color |
| Causes: | Two or more toner cartridges of the same color are detected. |
| Remedy: | Install the cartridge of the specified in the specified position. |
| Error code: | F072 |
| Description: | PU Flash Error |
| Remedy: | Change the PU board |
| Error code: | F110 |
| Description: | Finisher Staple Motor Failure An error was detected in the Staple Motor. |
| Causes: | • Finisher Staple Motor • Finisher Control Board |
| Remedy: | 1 Test these sensors. • Staple Clock Sensor • Fold Home Position Sensor Run the appropriate Service Diagnostics sensor test. Do the sensors operate? Go to Step 2. Replace the sensor. If the error persists, go to Step 2. 2 Test the Staple Motor. 1. Close the Interlock Switches for test. 2. Run the Service Diagnostics Staple Motor tests. Does the motor operate? Replace the Finisher Control Board. If the error persists, go to Step 4. Go to Step 3. 3 Check for +24 V to the Staple Motor. Disconnect CN71. Is there +24 V across CN71-1 and -2 <=> ground? Replace the Staple Motor. Replace the harness. If the error persists, go to Step 4. 4 Check all pins of the Inverter Interface Cable for continuity. Disconnect CN1 and CN2 from the Finisher Control Board and the opposite end from the Inverter. Is the cable conductive? Replace the Inverter Power Supply. Replace the cable. |
| Error code: | F111 |
| Description: | Finisher Stack Handling Motor Failure The Delivery Belt Home Position Sensor detected a Stack Handling error. |
| Causes: | • Finisher Stack Handling Motor • Finisher Control Board |
| Remedy: | 1 Check the delivery mechanism. Does the Delivery Belt turn freely when operated manually? Go to Step 2. Repair the mechanism. 2 Test the Delivery Belt Home Position Sensor. Run the Service Diagnostics Exit Belt Home Position Sensor test. Does the sensor operate? Go to Step 3. Replace the sensor. If the error persists, go to Step 3. 3 Test the Staple Motor. 1. Close the Interlock Switches for test. 2. Run the Service Diagnostics Staple Motor tests. Does the motor operate? Replace the Finisher Control Board. If the error persists, go to Step 4. Go to Step 4. 4 Check for +24 V to the Staple Motor. Disconnect CN59. Is there +24 V across CN59-1 and -2 <=> ground? Replace the Stack Handling Motor. Replace the harness. If the error persists, go to Step 5. 5 Check all pins of the Inverter Interface Cable for continuity. Disconnect CN1 and CN2 from the Finisher Control Board and the opposite end from the Inverter. Is the cable conductive? Replace the Inverter Power Supply. Replace the cable. |
| Error code: | F112 |
| Description: | Controller response anomaly |
| Causes: | CU-SU communication error detected by the scanner |
| Remedy: | If the error occurs frequently, check for the proper connection between the CU PCB and the SU PCB. |
| Error code: | F113 |
| Description: | Scanner CPU exception |
| Causes: | Anomalous program on the scanner side |
| Remedy: | The SU PCB, the scanner or the scanner firmware may have some problems. |
| Error code: | F114 |
| Description: | Scanner CPU exception |
| Causes: | CPU exception on the scanner side |
| Remedy: | The SU PCB, the scanner or the scanner firmware may have some problems. |
